![How to configure Sub-folders with Cloudflare on Feather](https://cdn.feather.blog?src=https%3A%2F%2Fwww.notion.so%2Fimage%2Fhttps%3A%252F%252Fprod-files-secure.s3.us-west-2.amazonaws.com%252F1631a2ee-6541-4fd1-b6c5-e6268d8d6829%252F368c6c25-d45a-46d2-a229-cd13fd1fb7d1%252FFeather_(4).png%3Ftable%3Dblock%26id%3D0073c15e-0226-4270-b490-cfd90b590031%26cache%3Dv2&optimizer=image&quality=80&width=280)
Do not index
Do not index
This is the most robust and easiest way to add Sub-folders. Any type of website can be configured to use sub-folders when your DNS records are hosted on Cloudflare. If you are not using Cloudflare as your DNS, I suggest you to use it. Around 20% of the website are powered by Cloudflare.
Let’s get started with the setup,
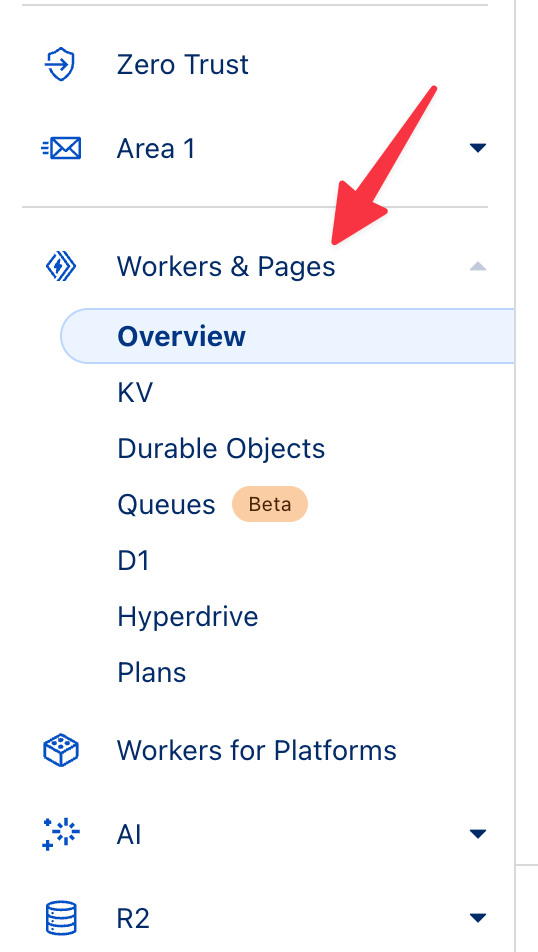
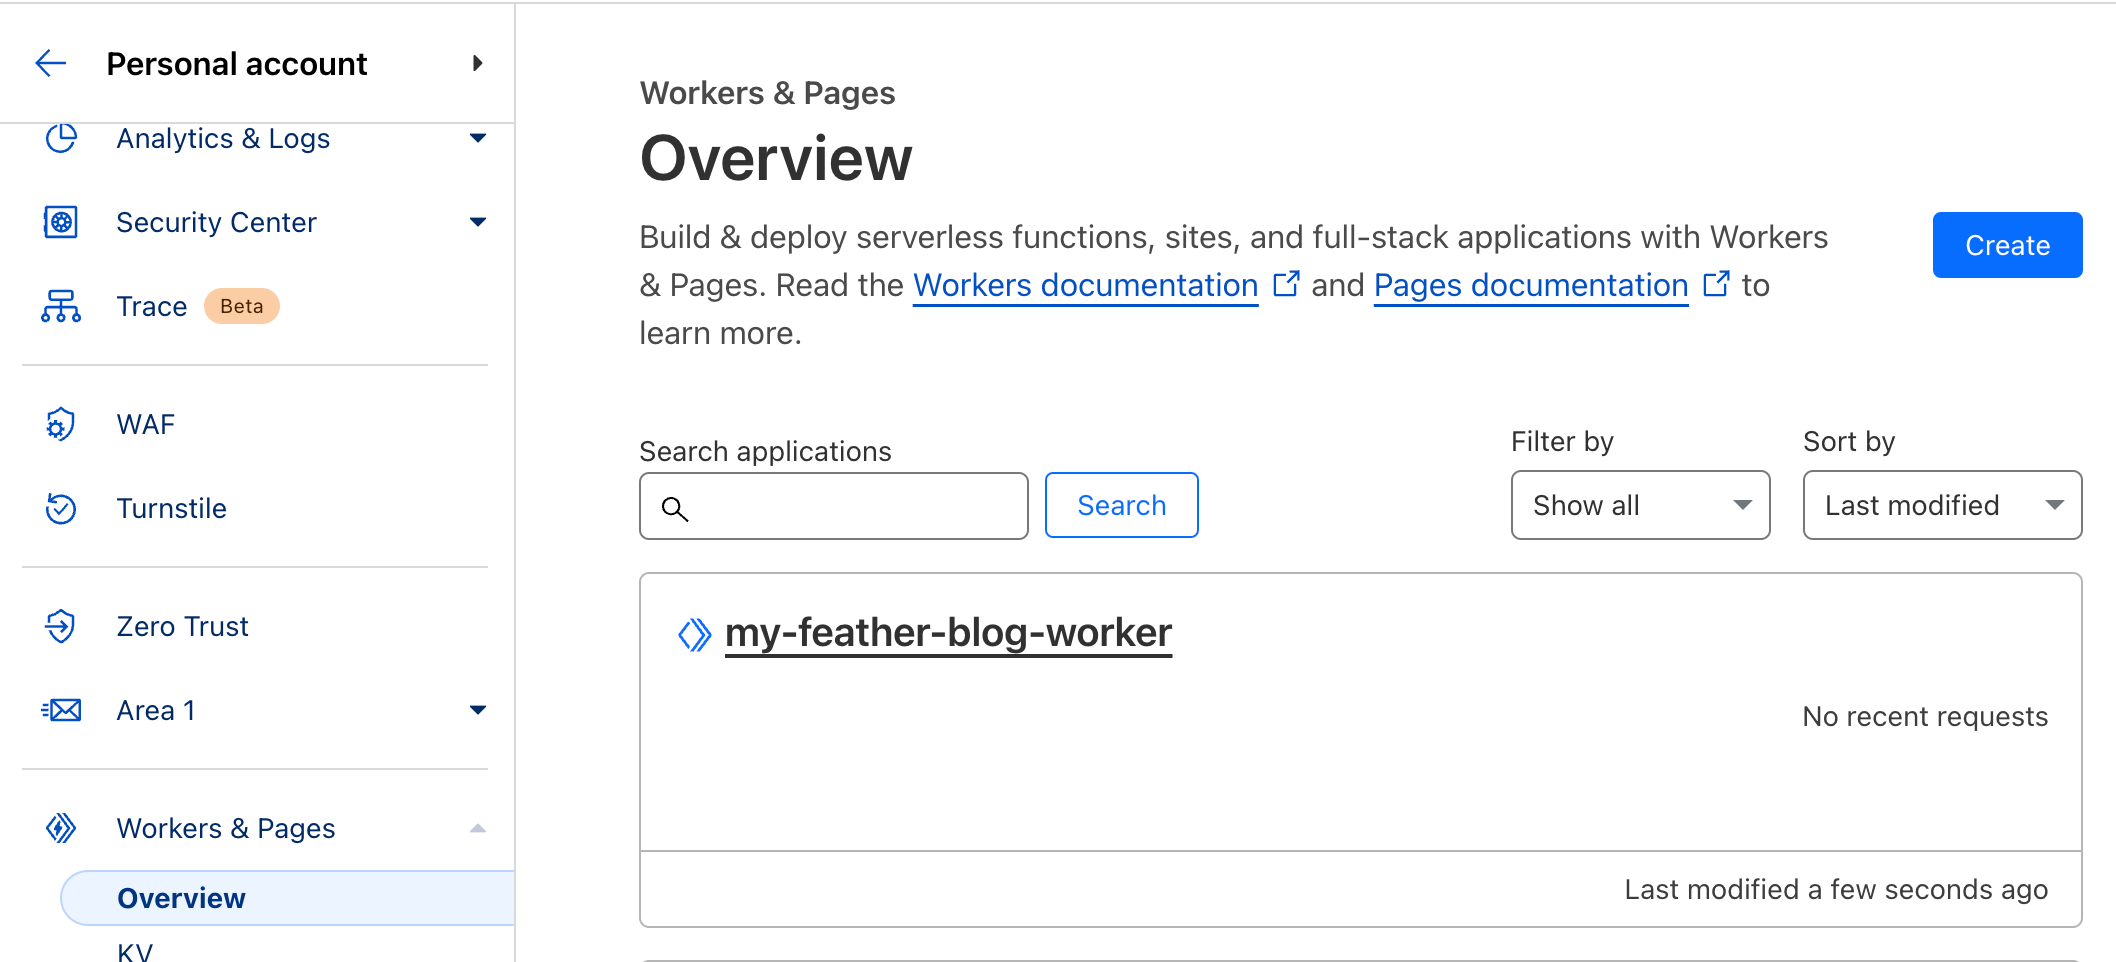
1. Open Workers Dashboard
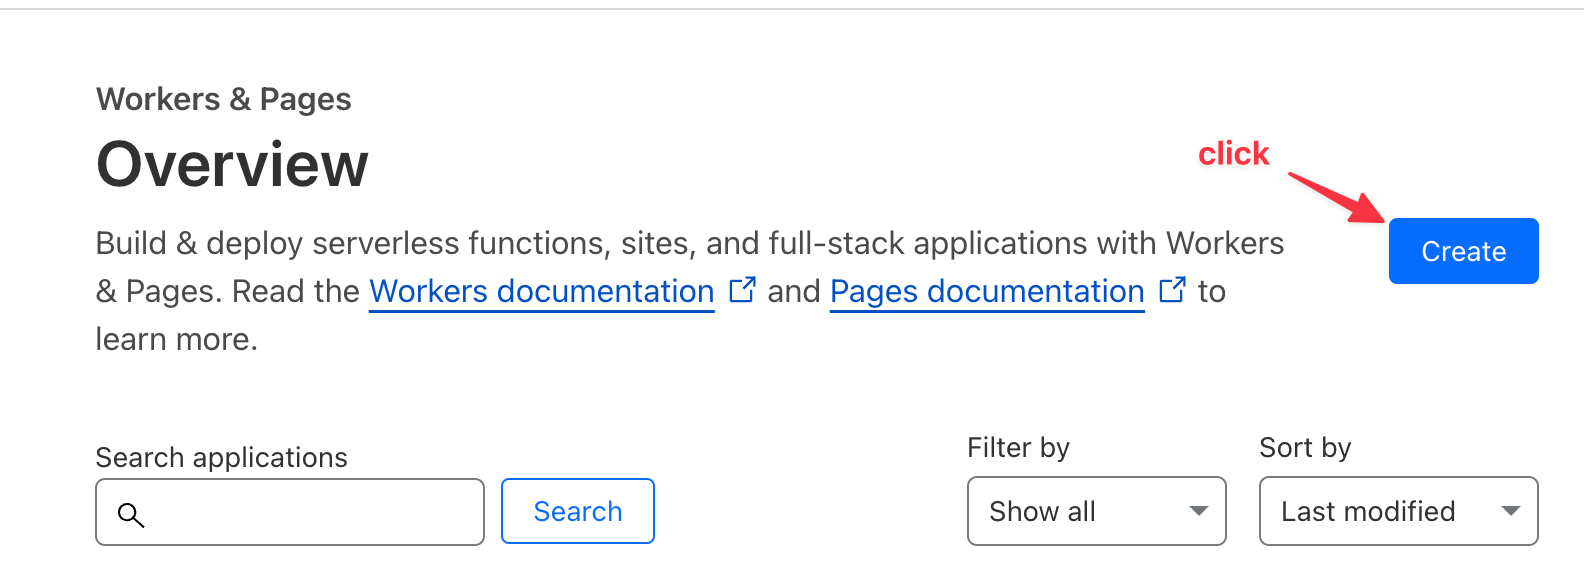
![notion image](https://cdn.feather.blog?src=https%3A%2F%2Fusenotioncms.com%2Fproxy-prod%2Fblock%2F1d6c20b0-de12-4533-8dcb-a2705d47d62f%2F1631a2ee-6541-4fd1-b6c5-e6268d8d6829%2Fa8698961-1844-4f08-b154-4a04ee7ebc60%2FCleanShot_2024-06-21_at_19.37.242x.png&optimizer=image&quality=80&width=280)
2. Create a service
![notion image](https://cdn.feather.blog?src=https%3A%2F%2Fusenotioncms.com%2Fproxy-prod%2Fblock%2F0d0fb85f-d1e8-4226-ae71-60dcacdd6e72%2F1631a2ee-6541-4fd1-b6c5-e6268d8d6829%2F2d8ce1ae-f548-4ec7-bc1b-48162be63244%2FCleanShot_2024-06-21_at_19.41.052x.png&optimizer=image&quality=80&width=280)
You can name this whatever you want.
![notion image](https://cdn.feather.blog?src=https%3A%2F%2Fusenotioncms.com%2Fproxy-prod%2Fblock%2Fffb4c06e-defd-41e0-9913-ea5eee54f189%2F1631a2ee-6541-4fd1-b6c5-e6268d8d6829%2Fff504885-d94f-48fe-b33c-52a4e048e8de%2FCleanShot_2024-06-21_at_19.44.542x.png&optimizer=image&quality=80&width=280)
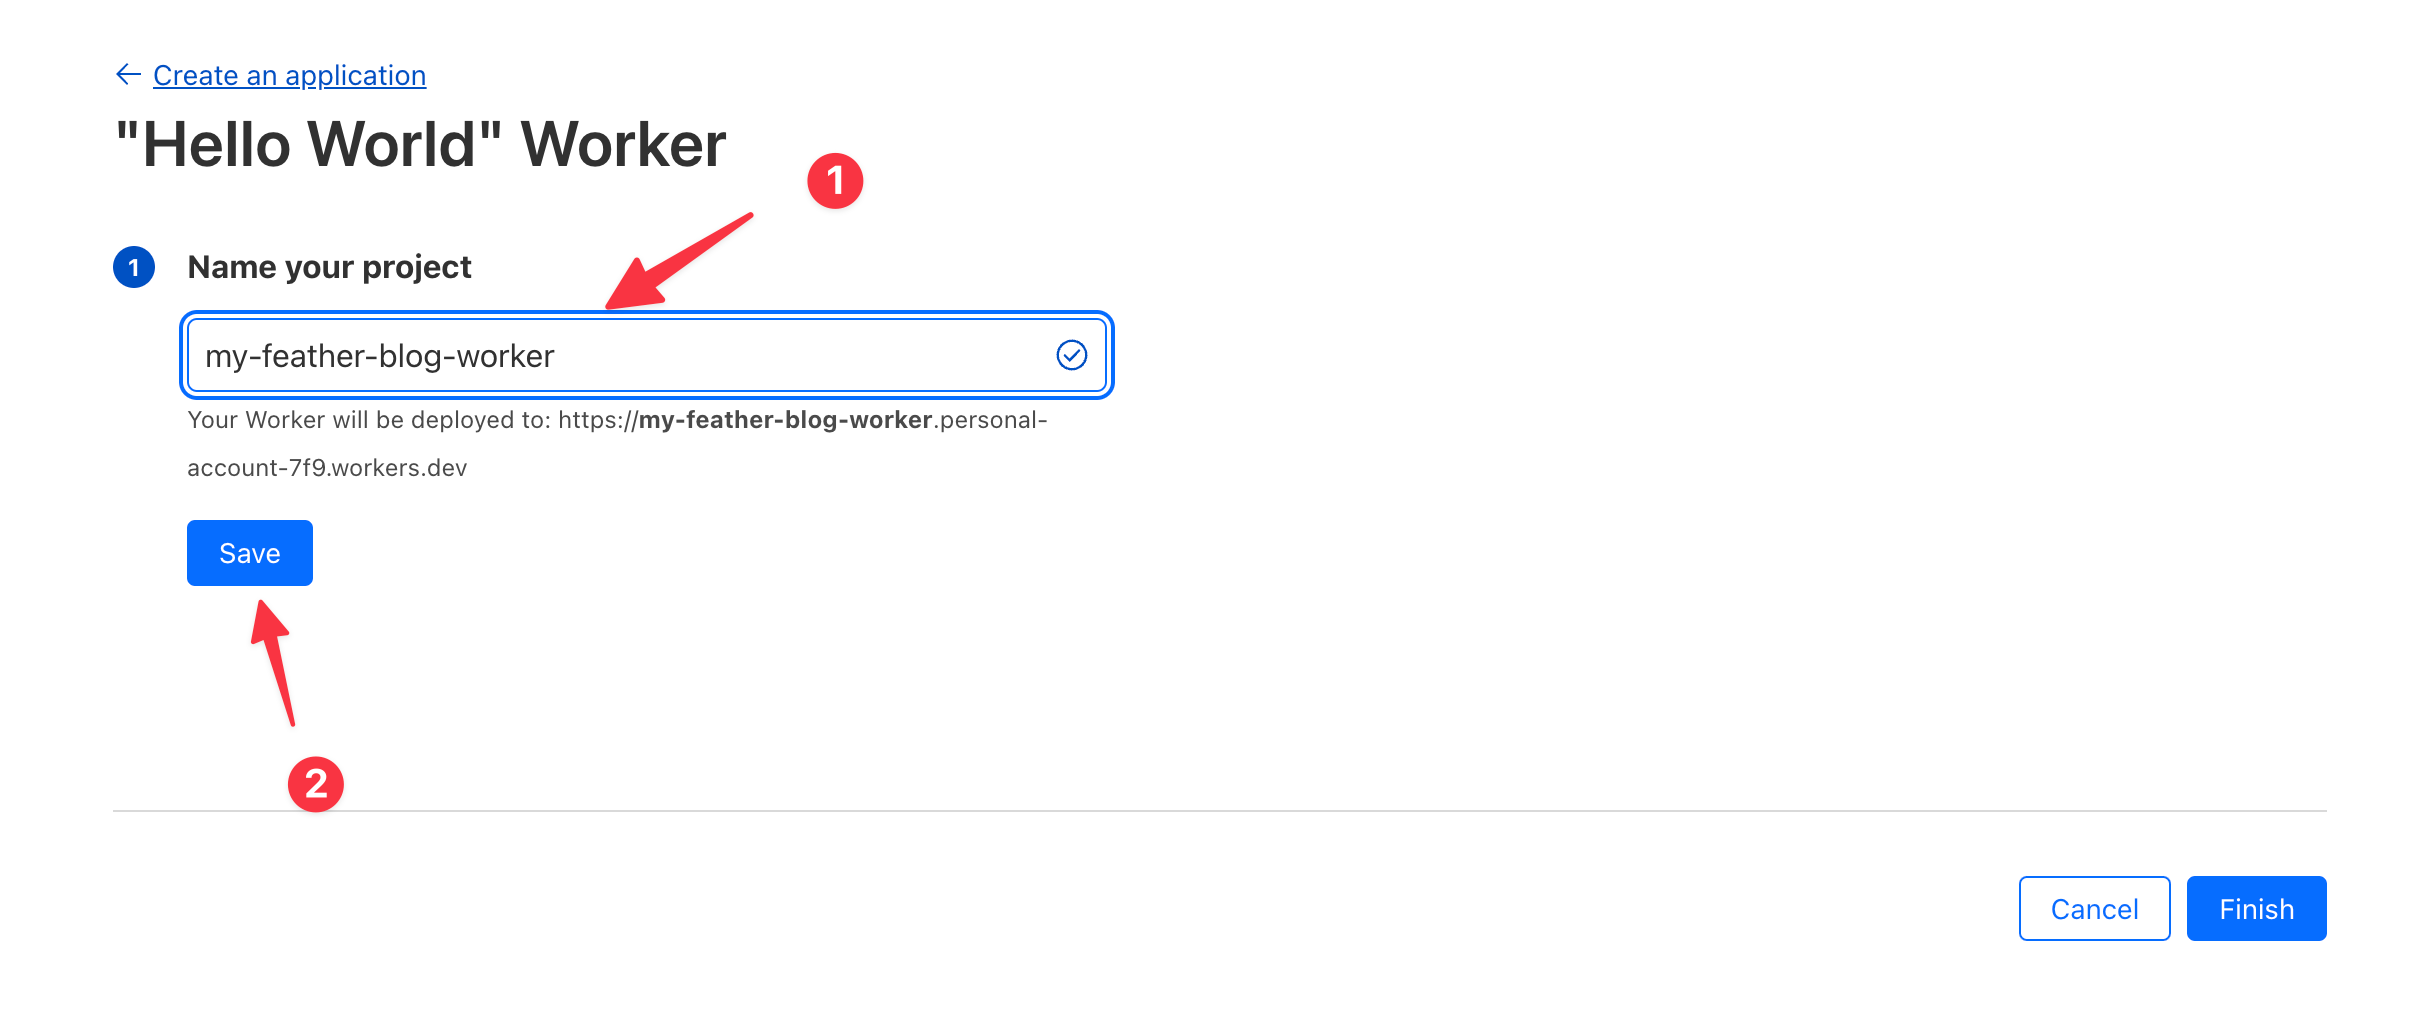
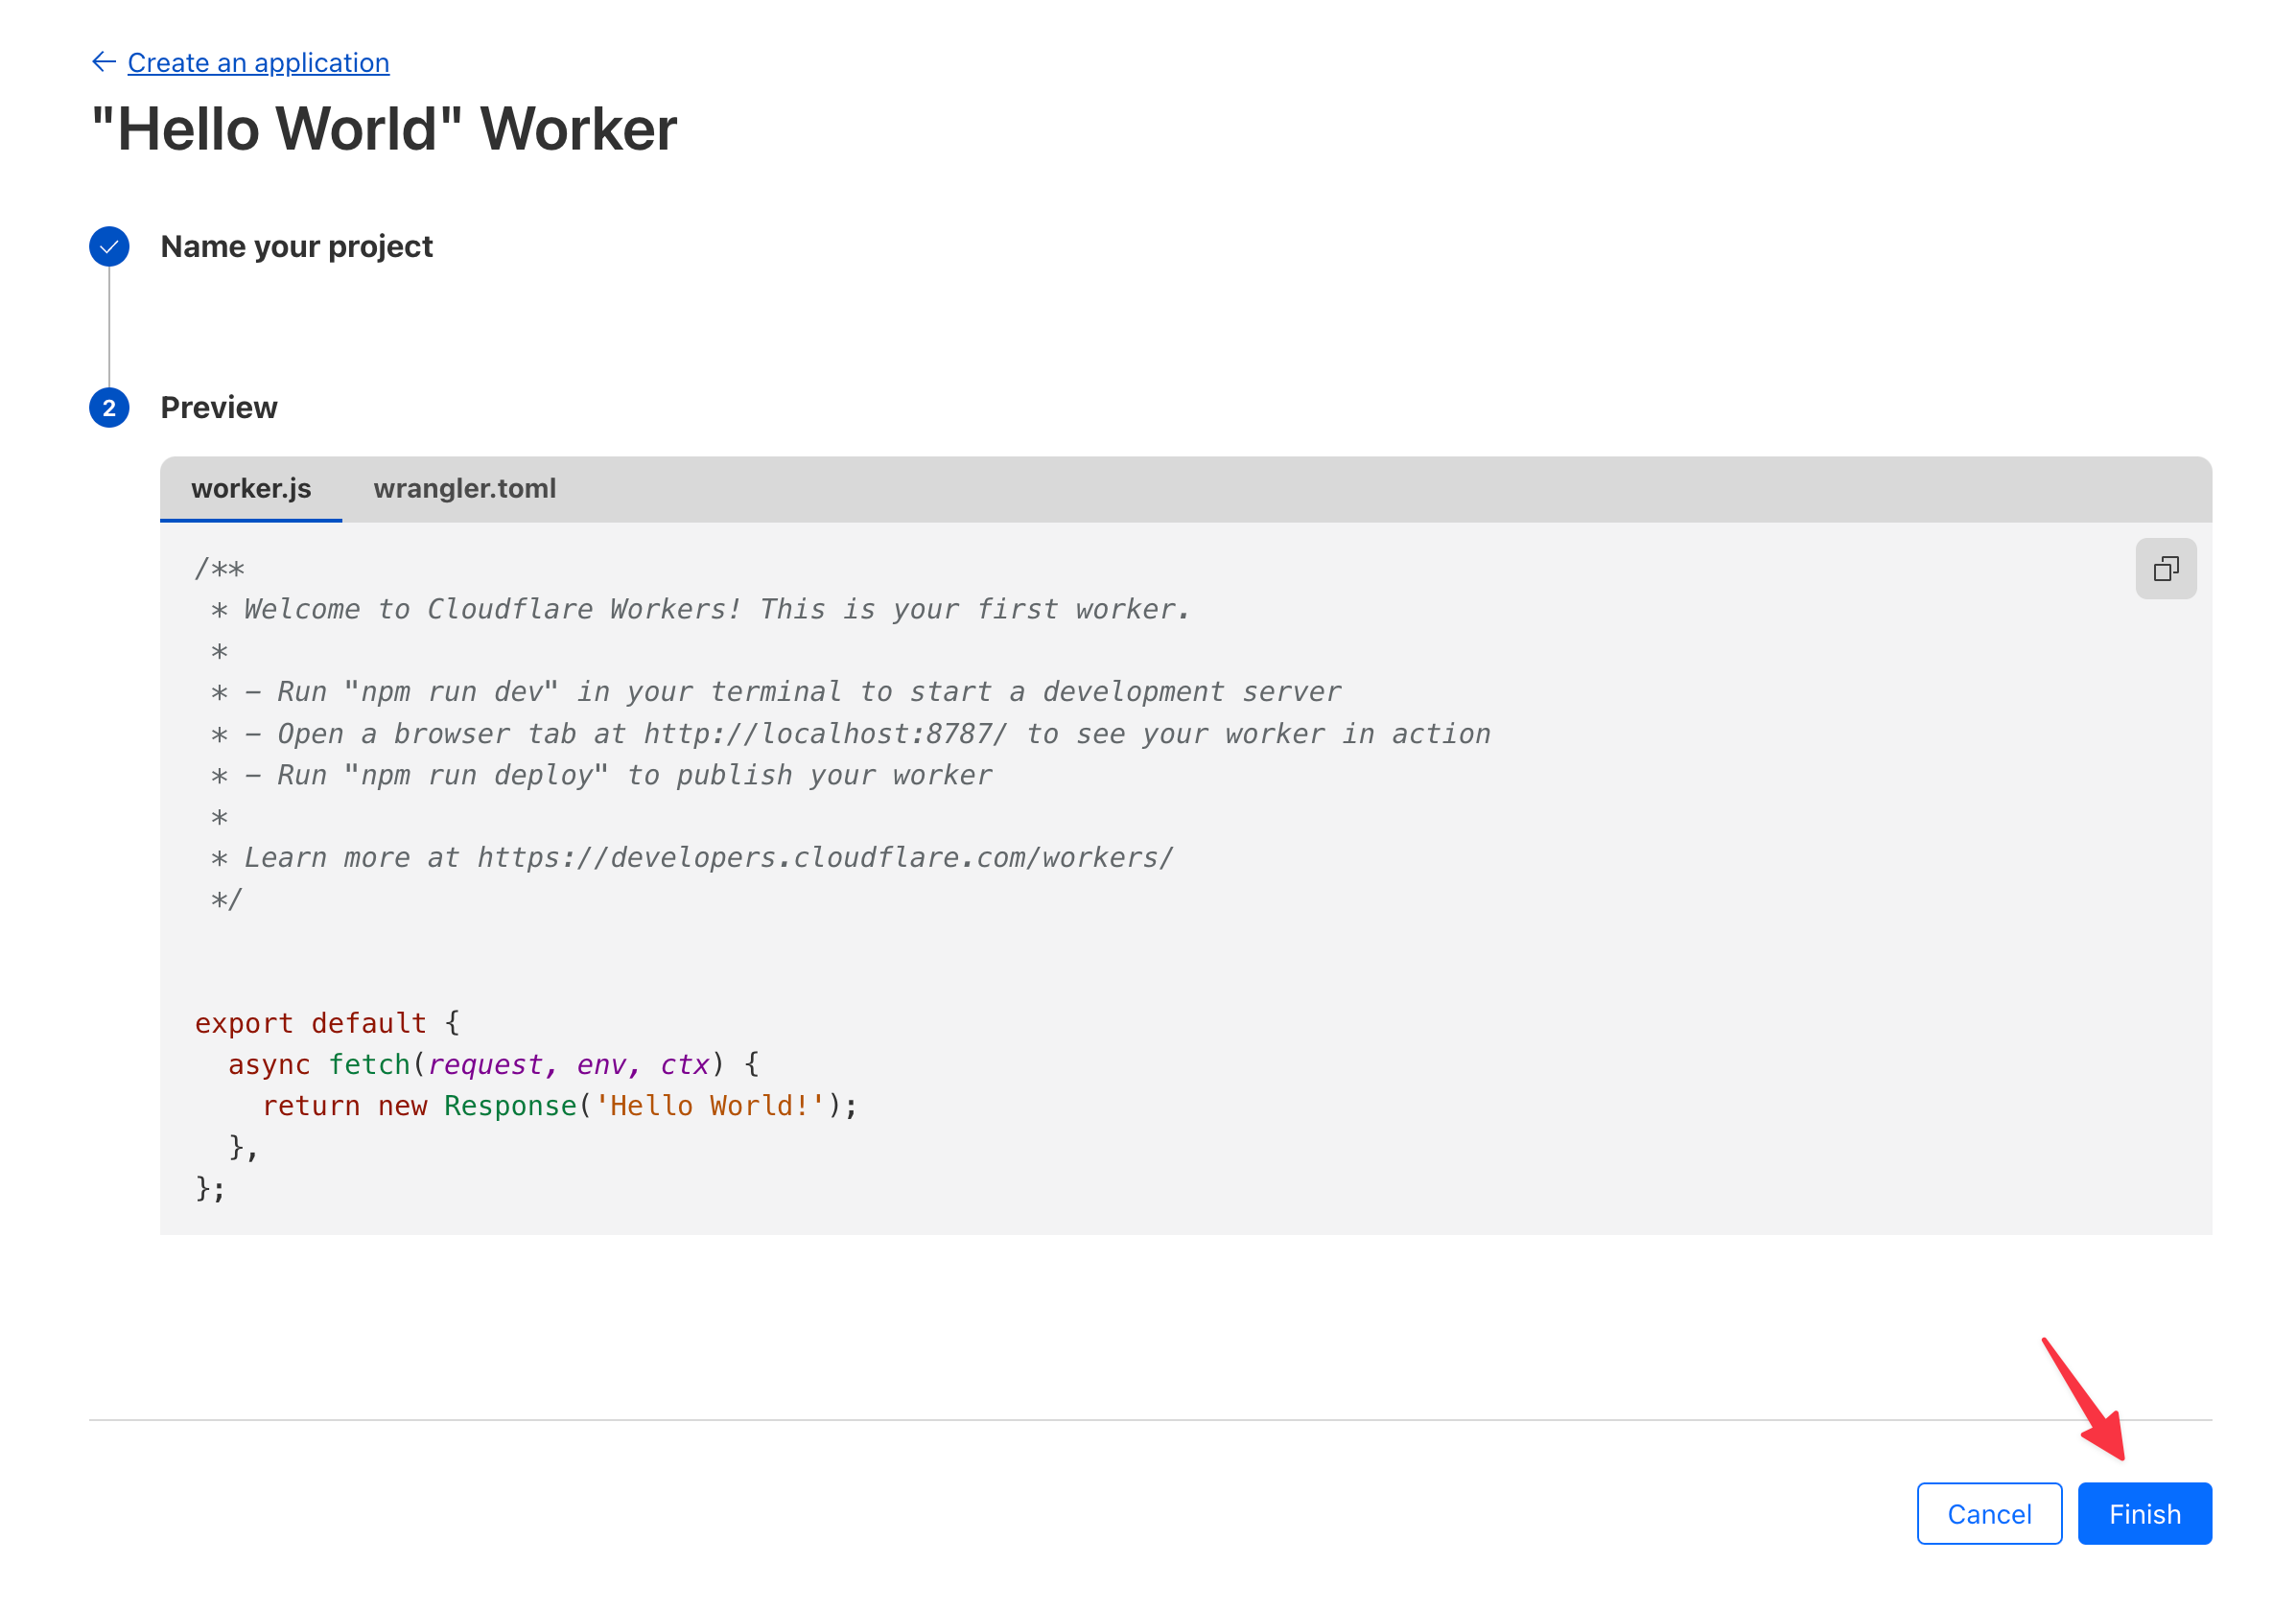
You cannot edit the worker code yet so simply press finish.
![notion image](https://cdn.feather.blog?src=https%3A%2F%2Fusenotioncms.com%2Fproxy-prod%2Fblock%2Ff2da84ec-1ed8-4e19-9dc7-62467cfb9b7b%2F1631a2ee-6541-4fd1-b6c5-e6268d8d6829%2F42965a8a-037a-49a5-8319-08a49a0659fc%2FCleanShot_2024-06-21_at_19.45.372x.png&optimizer=image&quality=80&width=280)
You should now see your worker in the workers overview page.
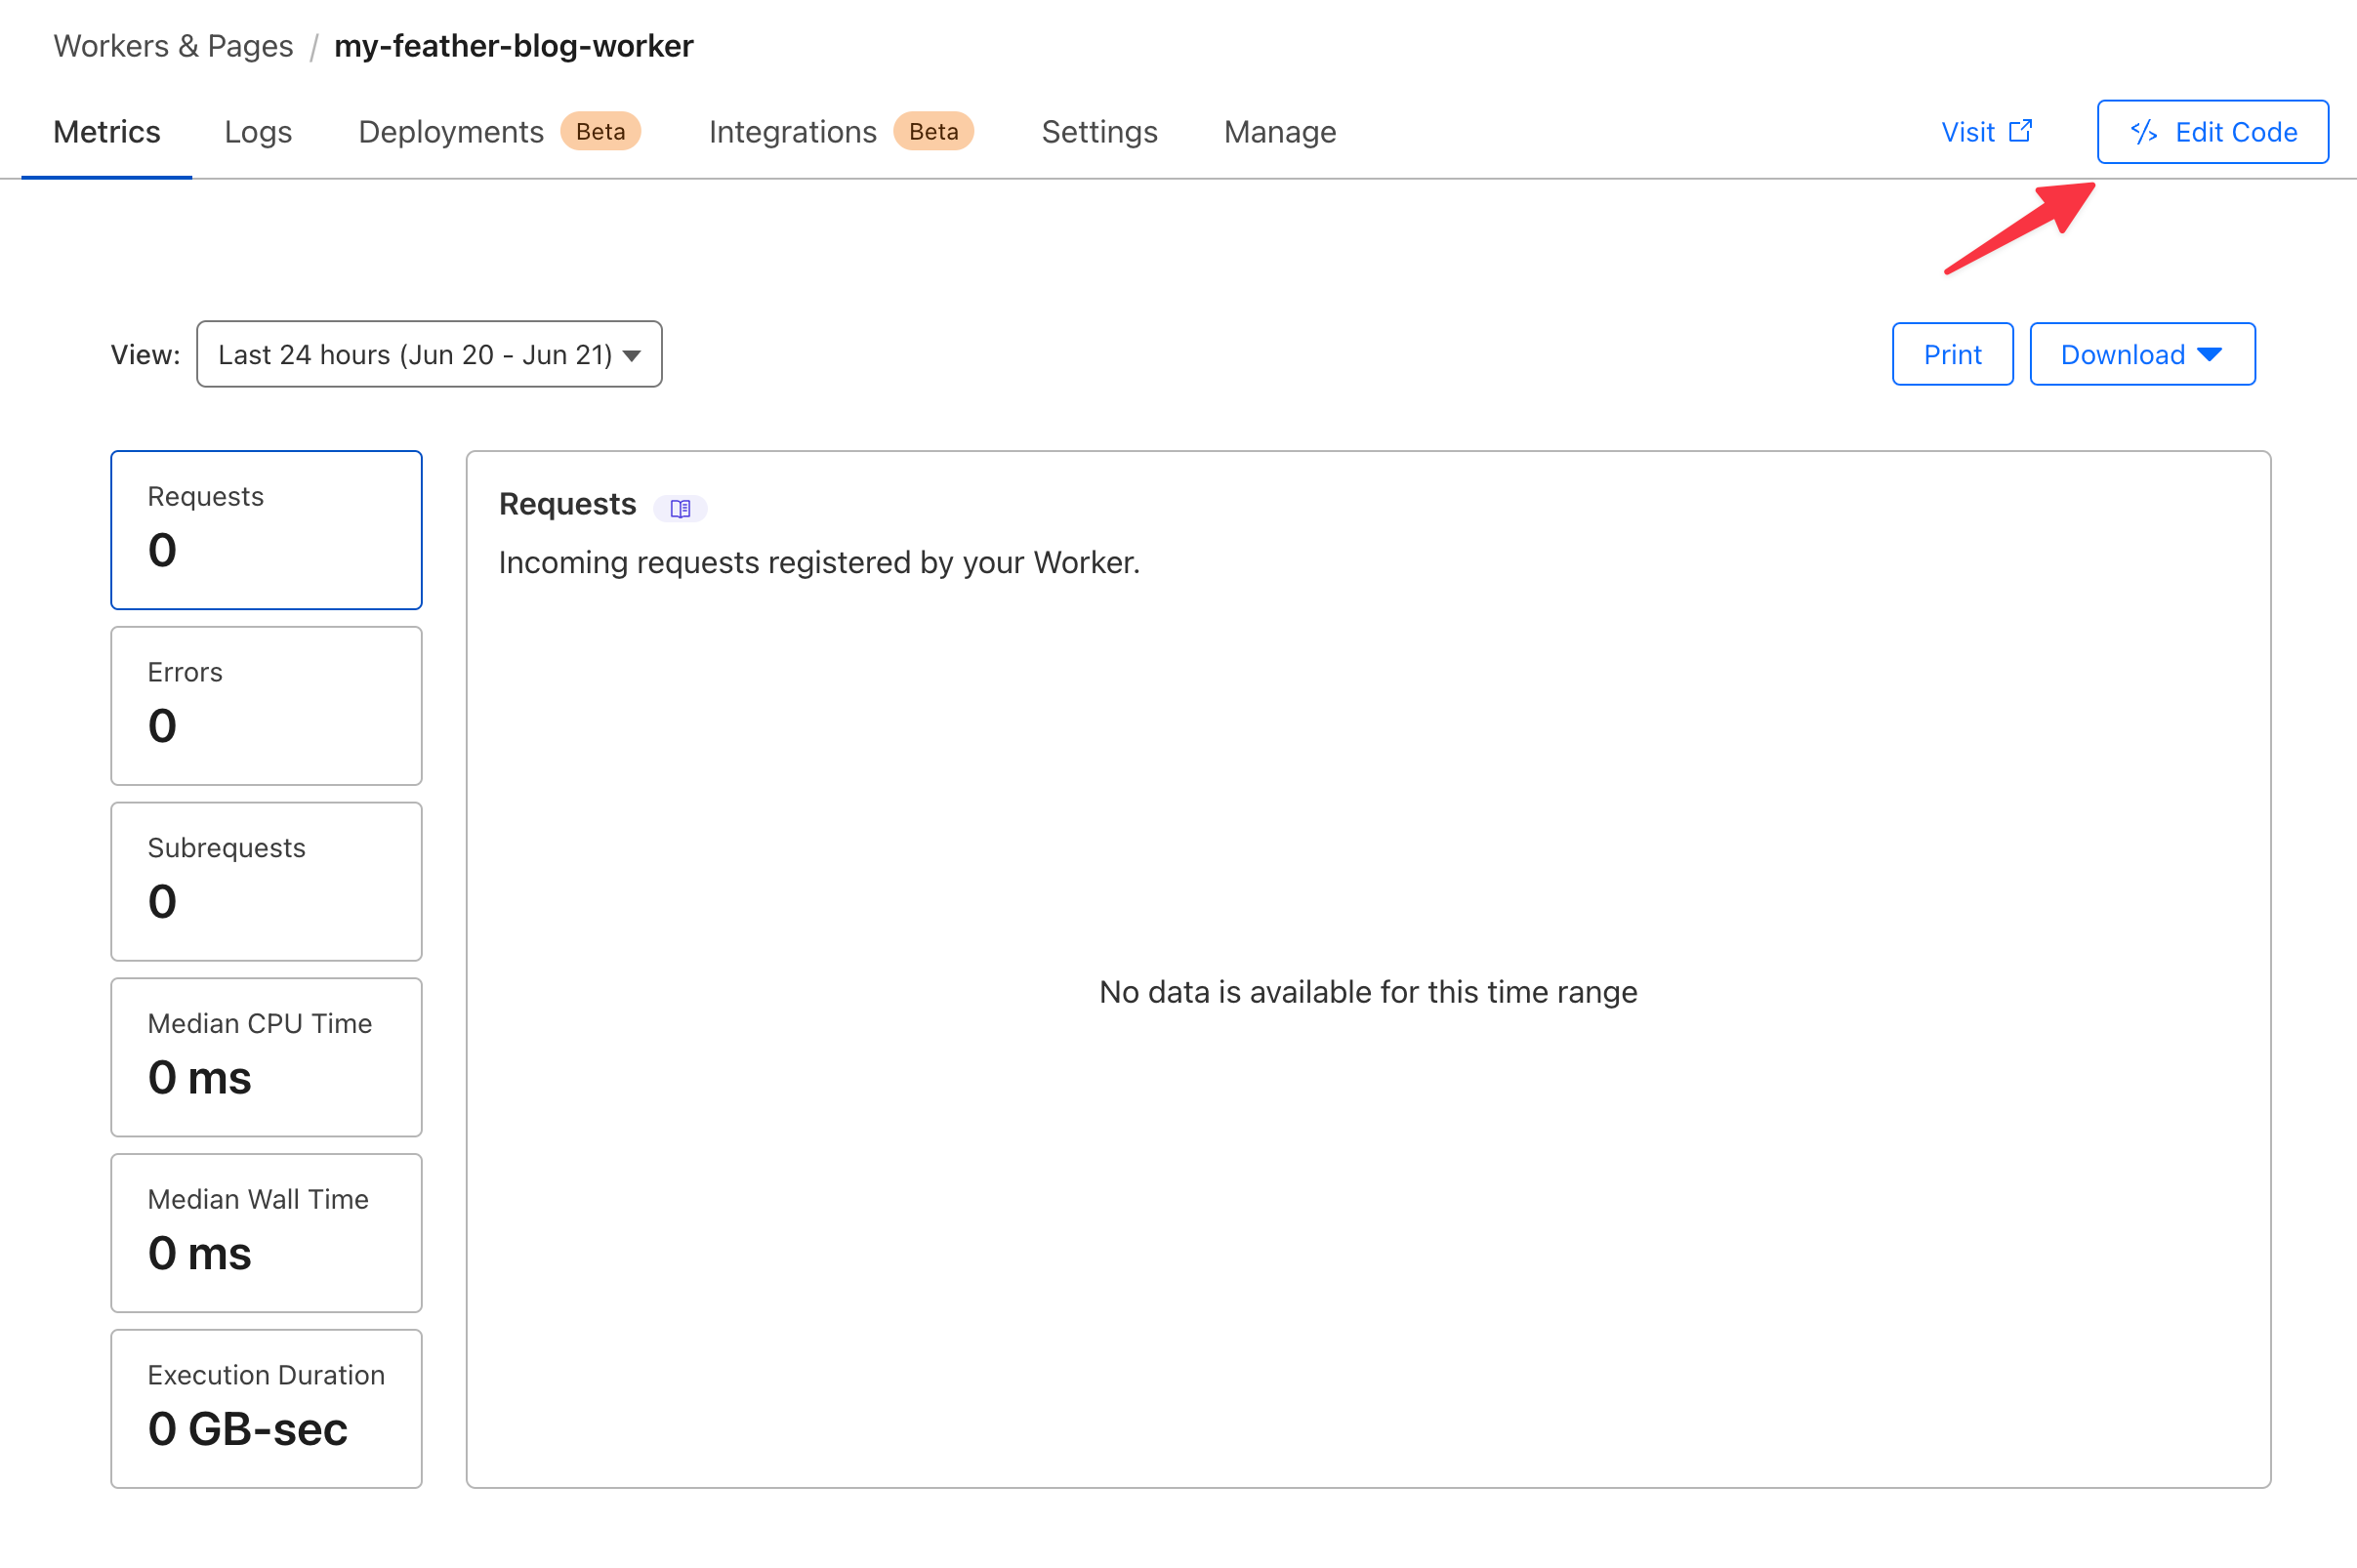
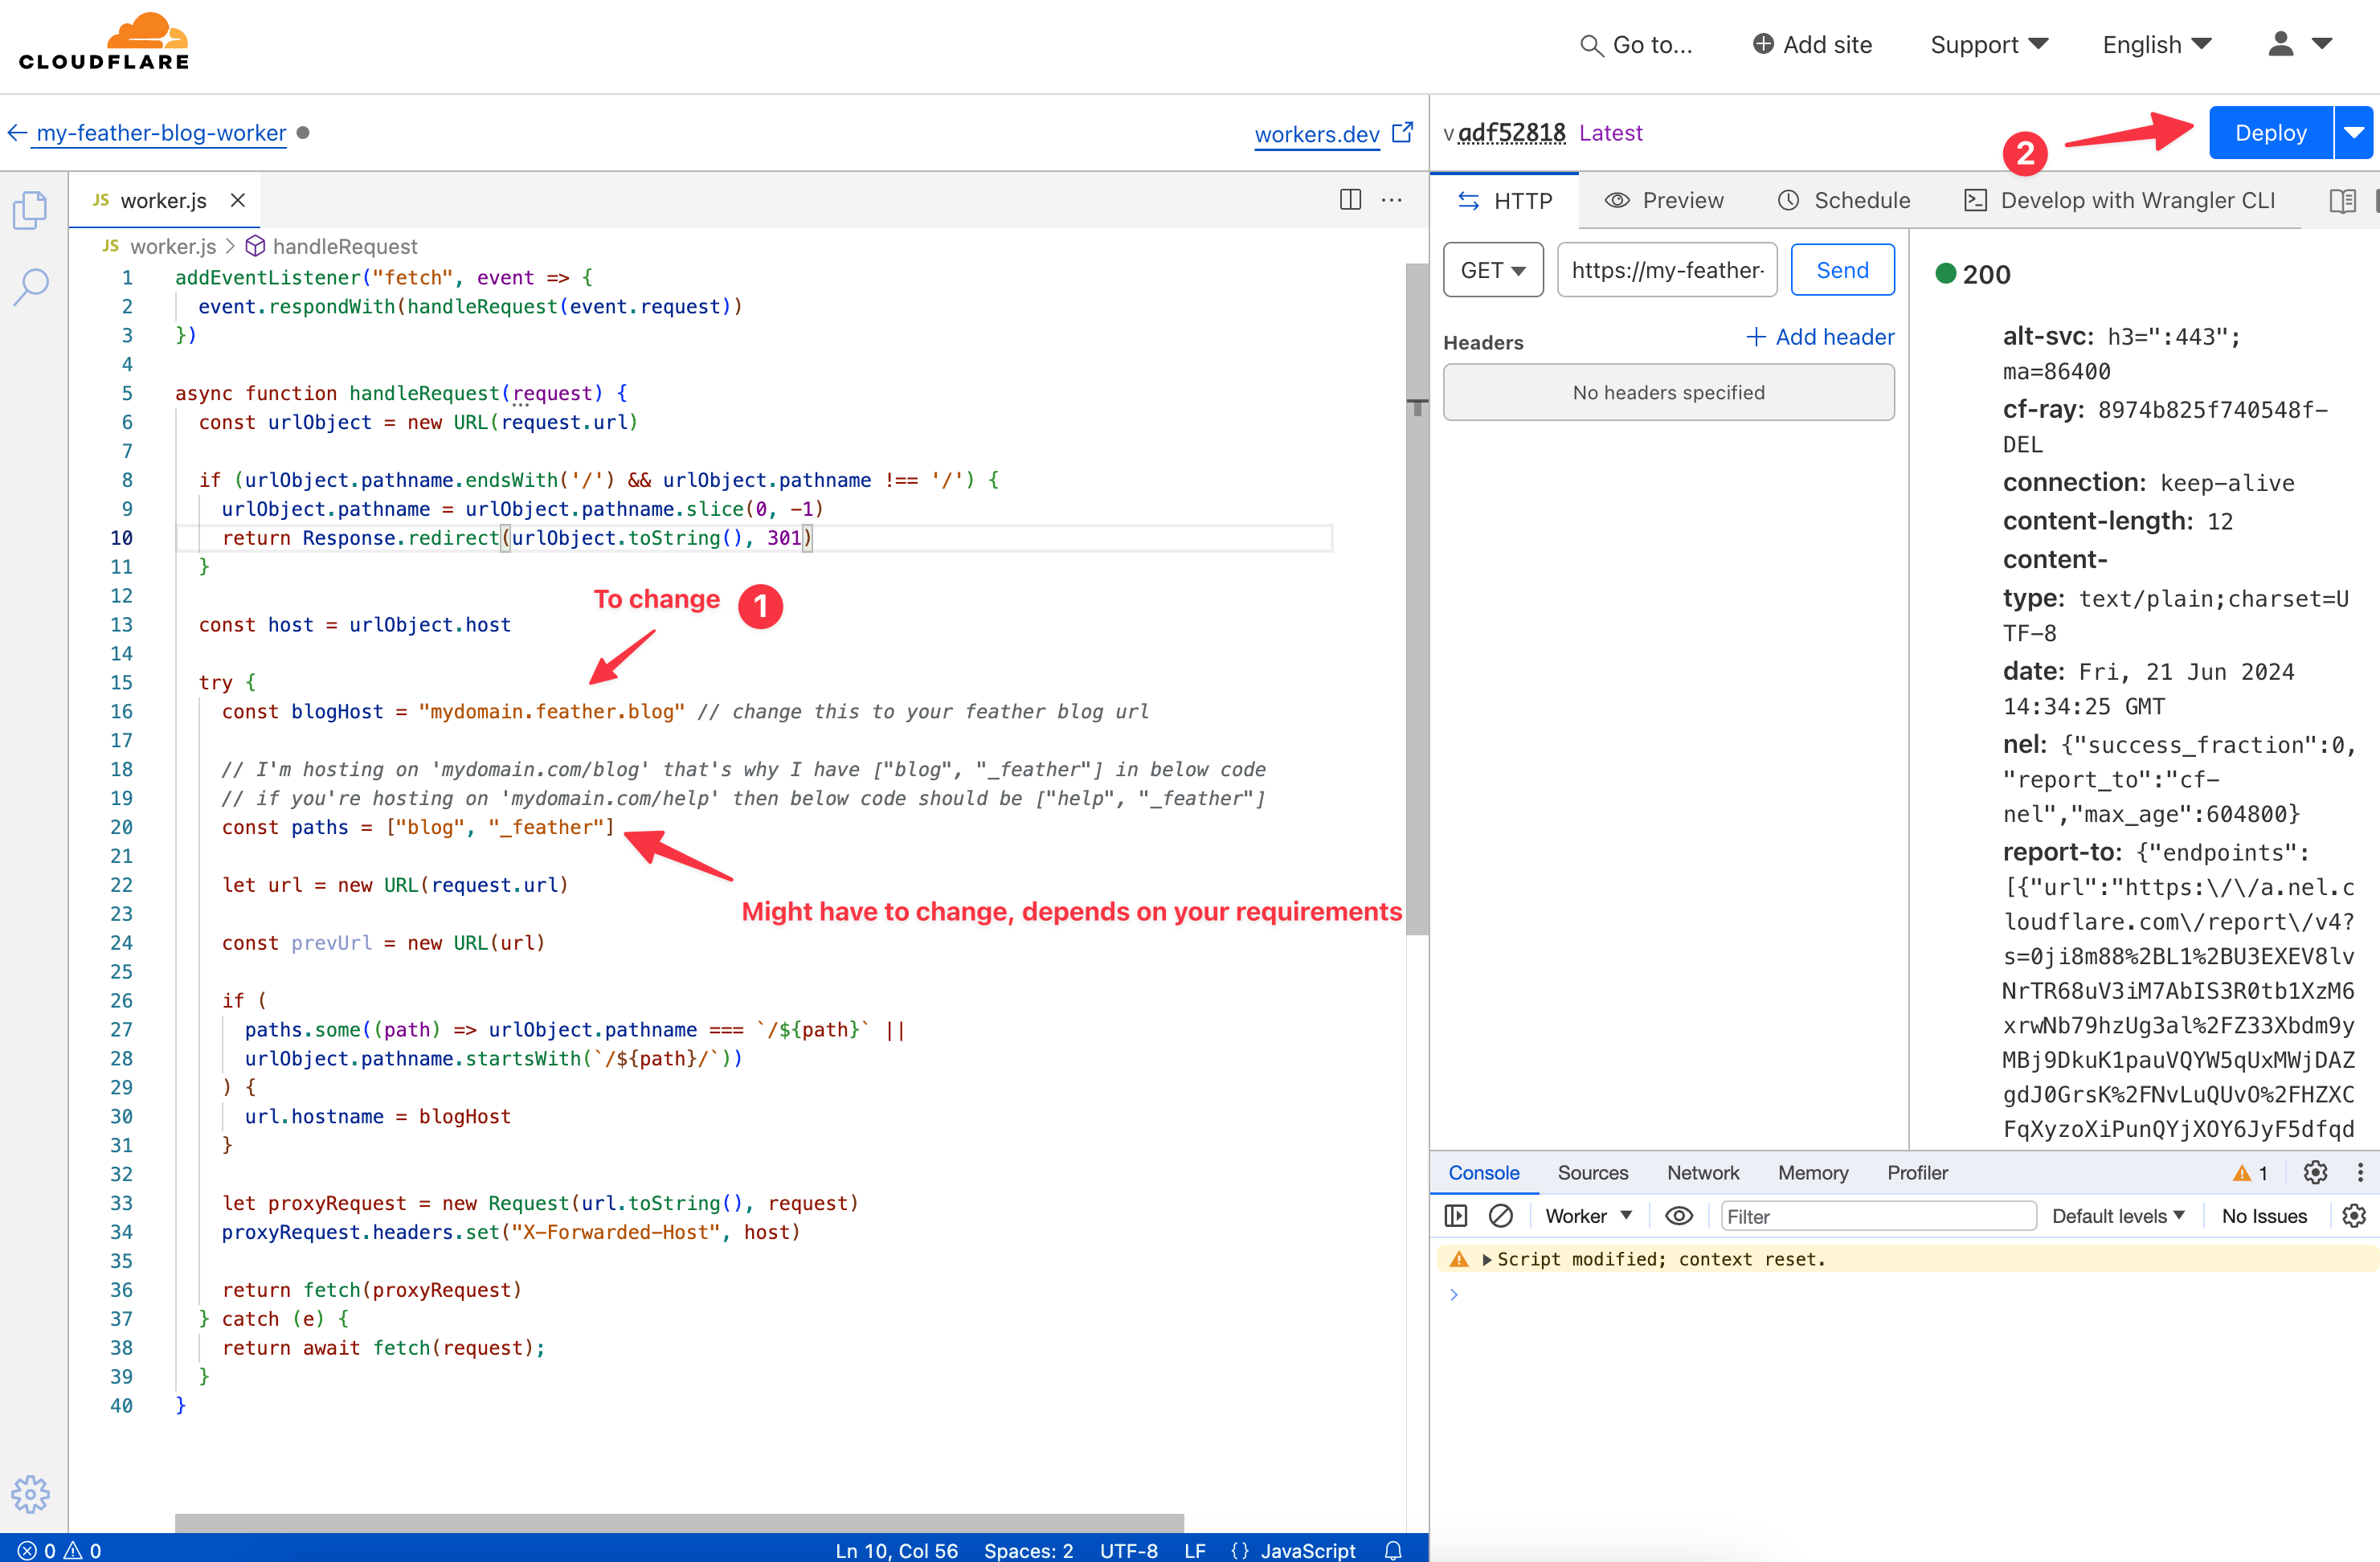
![notion image](https://cdn.feather.blog?src=https%3A%2F%2Fusenotioncms.com%2Fproxy-prod%2Fblock%2Ffc8aa233-02cd-4cd2-96a7-7275c14f6887%2F1631a2ee-6541-4fd1-b6c5-e6268d8d6829%2F7cd09f83-cd9c-4962-8537-c43bde0865d8%2FCleanShot_2024-06-21_at_19.47.232x.png&optimizer=image&quality=80&width=280)
3. Edit your worker
Click on your worker and press edit code.
![notion image](https://cdn.feather.blog?src=https%3A%2F%2Fusenotioncms.com%2Fproxy-prod%2Fblock%2F5a20792d-b56c-4aa3-be7a-183ad08d9b0c%2F1631a2ee-6541-4fd1-b6c5-e6268d8d6829%2F39687f6e-b3c1-4f6a-9351-9cdb1ef335a3%2FCleanShot_2024-06-21_at_19.49.082x.png&optimizer=image&quality=80&width=280)
Remove all the existing code and paste the following code into the worker.
addEventListener("fetch", event => {
event.respondWith(handleRequest(event.request))
})
async function handleRequest(request) {
const urlObject = new URL(request.url)
if (urlObject.pathname.endsWith('/') && urlObject.pathname !== '/') {
urlObject.pathname = urlObject.pathname.slice(0, -1)
return Response.redirect(urlObject.toString(), 301)
}
const host = urlObject.host
try {
const blogHost = "mydomain.feather.blog" // change this to your feather blog url
// I'm hosting on 'mydomain.com/blog' that's why I have ["blog", "_feather"] in below code
// if you're hosting on 'mydomain.com/help' then below code should be ["help", "_feather"]
const paths = ["blog", "_feather"]
let url = new URL(request.url)
const prevUrl = new URL(url)
if (
paths.some((path) => urlObject.pathname === `/${path}` ||
urlObject.pathname.startsWith(`/${path}/`))
) {
url.hostname = blogHost
}
let proxyRequest = new Request(url.toString(), request)
proxyRequest.headers.set("X-Forwarded-Host", host)
return fetch(proxyRequest)
} catch (e) {
return await fetch(request);
}
}
Please make sure to update line 16 & line 20 accordingly.
Once you paste it, your worker should look like this. Make the changes as required and then press deploy.
![notion image](https://cdn.feather.blog?src=https%3A%2F%2Fusenotioncms.com%2Fproxy-prod%2Fblock%2F0e172efd-c246-456b-b751-474e1507b37f%2F1631a2ee-6541-4fd1-b6c5-e6268d8d6829%2F236d3a0b-4a6b-4db5-9bd2-4c6c882277bb%2FCleanShot_2024-06-21_at_20.04.322x.png&optimizer=image&quality=80&width=280)
4. Set trigger routes
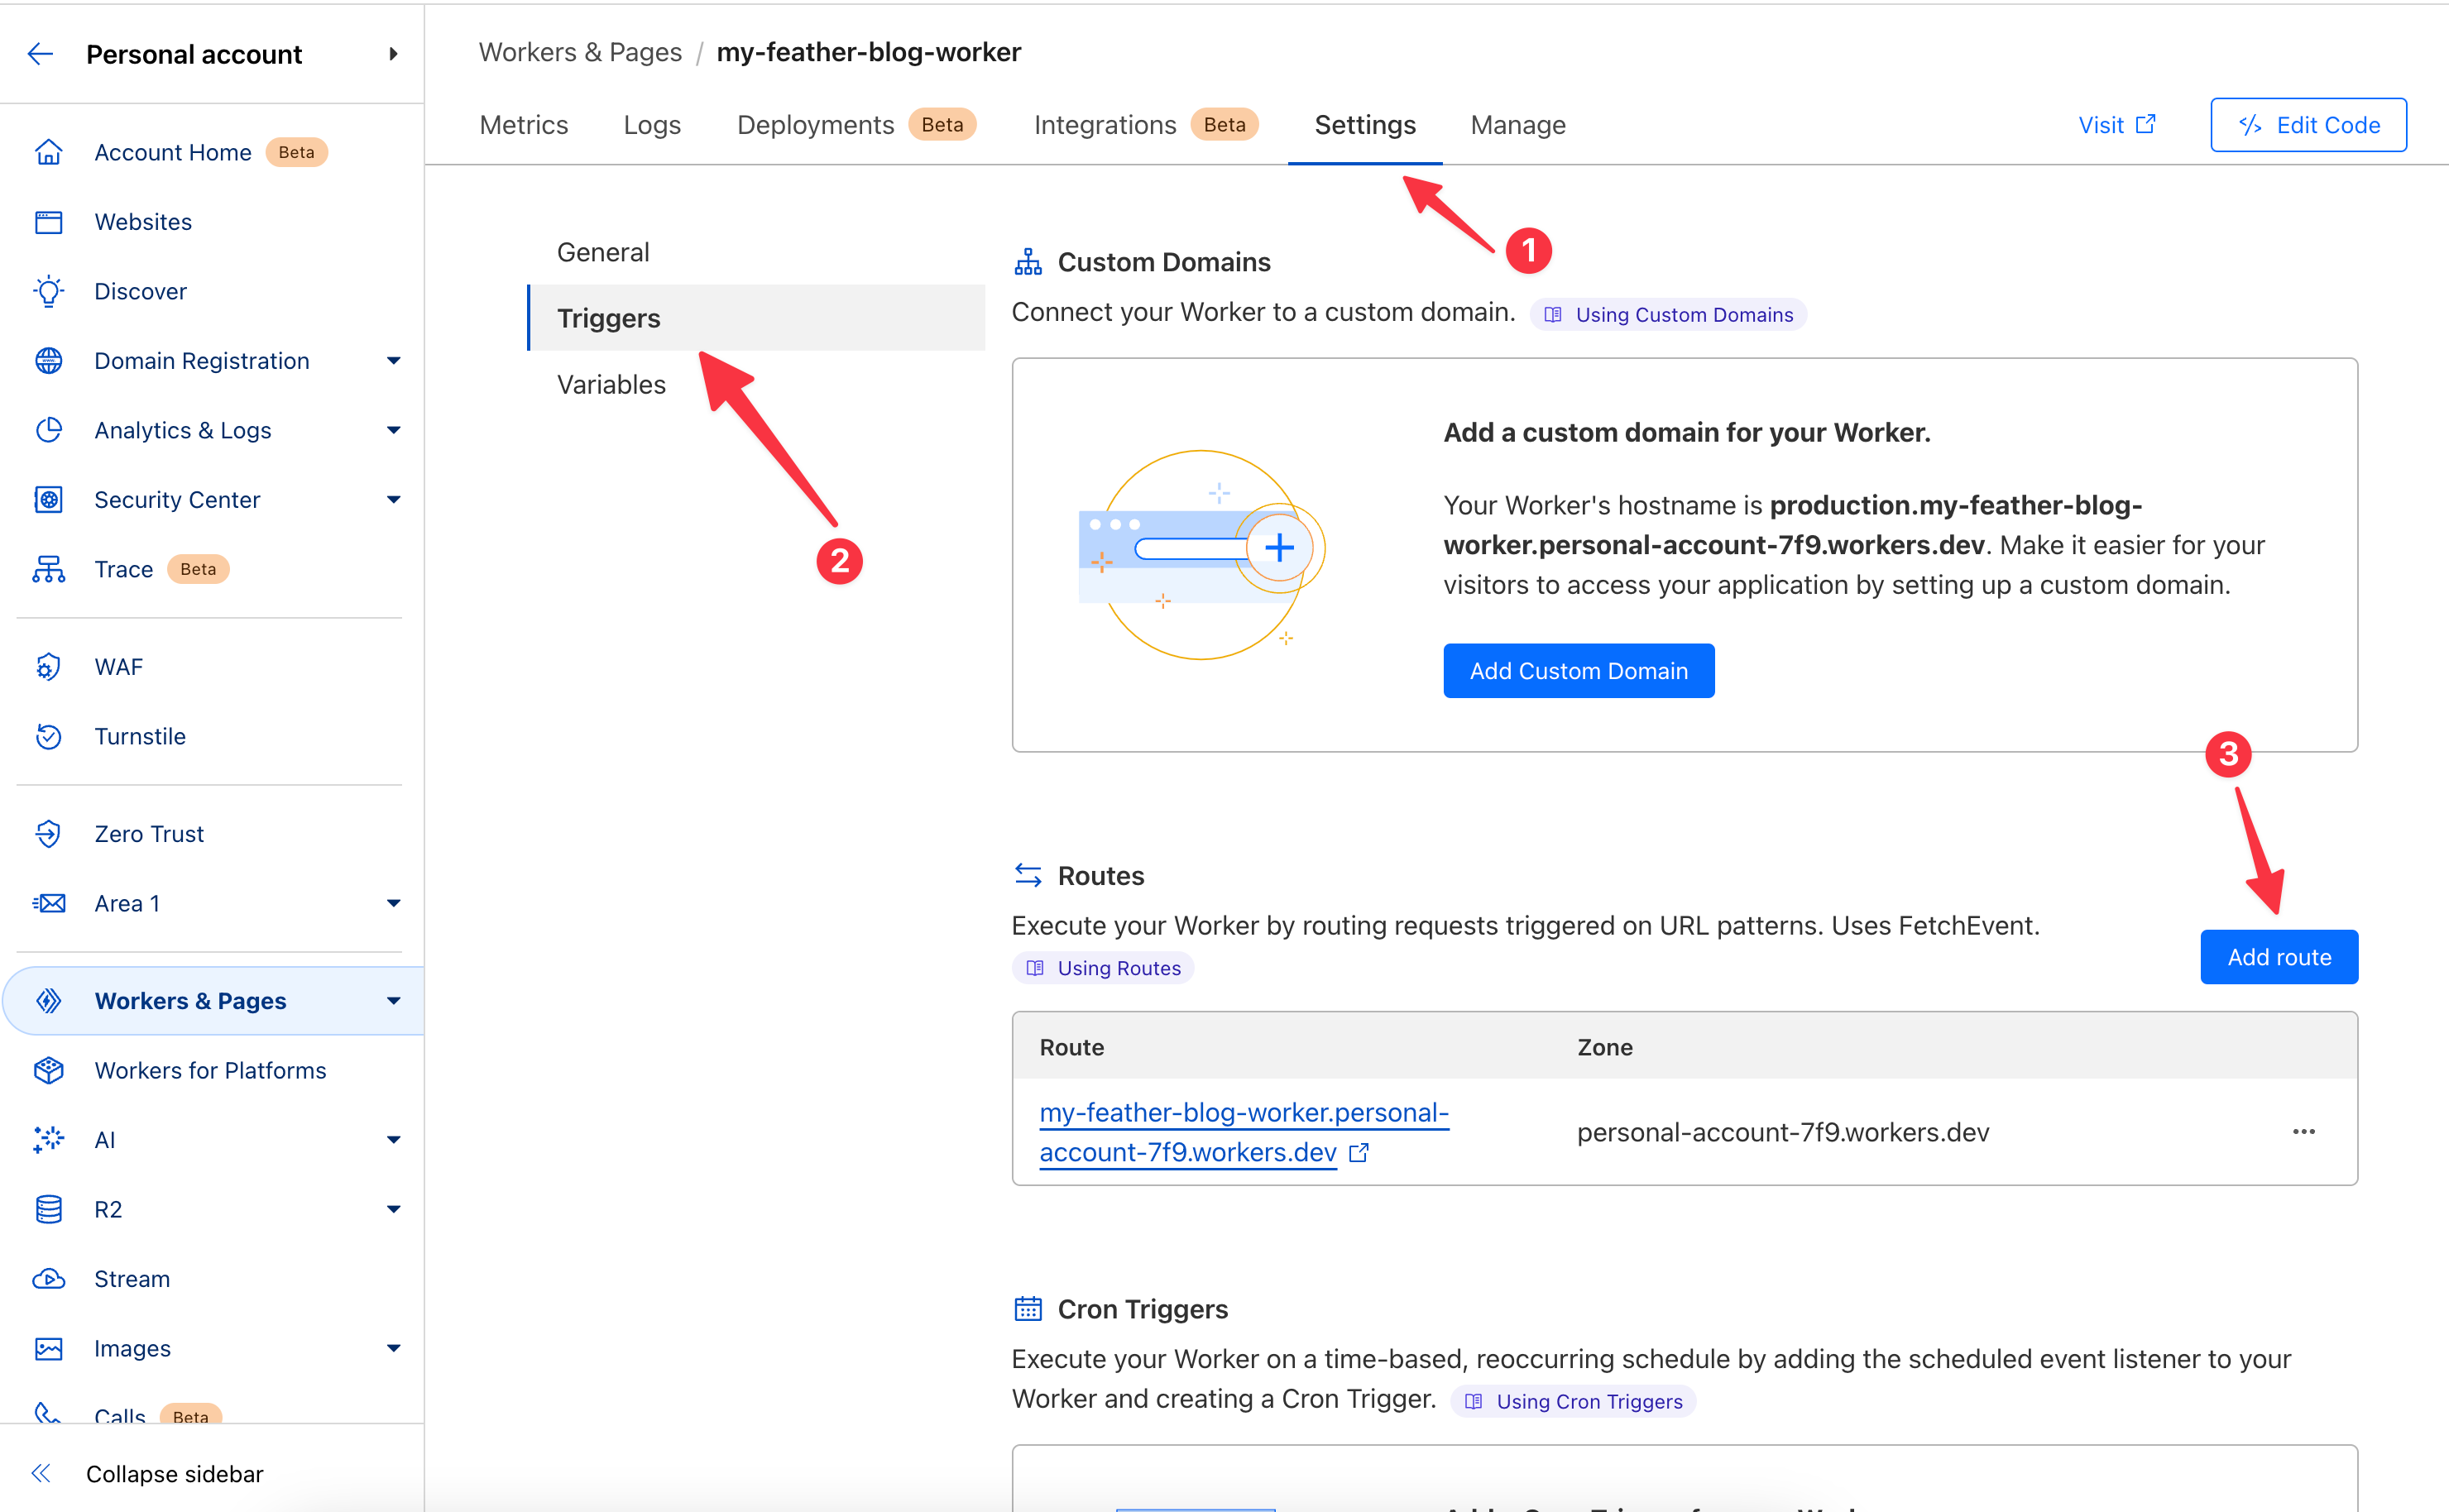
![notion image](https://cdn.feather.blog?src=https%3A%2F%2Fusenotioncms.com%2Fproxy-prod%2Fblock%2F27328dc7-2fba-46d2-a264-f7d1ce250c2b%2F1631a2ee-6541-4fd1-b6c5-e6268d8d6829%2F4179cbc7-2e81-4514-bd9b-acff5122bfa7%2FCleanShot_2024-06-21_at_20.10.062x.png&optimizer=image&quality=80&width=280)
We need 2 routes
- /blog* (if you are hosting on
mydomain/help
, you will need to write/help*
instead)
- /_feather*
Let’s consider here that you’re trying to host Sub-folder at
/blog
for ecomreco.com
domain. For that, you would have to select ecomreco.com
zone and add the required routes as shown in the below screenshots.![notion image](https://cdn.feather.blog?src=https%3A%2F%2Fusenotioncms.com%2Fproxy-prod%2Fblock%2Fb9b05b84-440e-4db0-9ffc-843211d604fa%2F1631a2ee-6541-4fd1-b6c5-e6268d8d6829%2Fcff756d3-7bd1-4a0d-aa21-e8bd86d66da2%2FCleanShot_2024-06-21_at_23.21.132x.png&optimizer=image&quality=80&width=280)
![notion image](https://cdn.feather.blog?src=https%3A%2F%2Fusenotioncms.com%2Fproxy-prod%2Fblock%2F66af3cf2-437e-463e-8dcb-ac9b8dcce480%2F1631a2ee-6541-4fd1-b6c5-e6268d8d6829%2Fdf55b4c2-edb3-4cbf-8a0b-79f1a81aaea5%2FCleanShot_2024-06-21_at_23.21.412x.png&optimizer=image&quality=80&width=280)
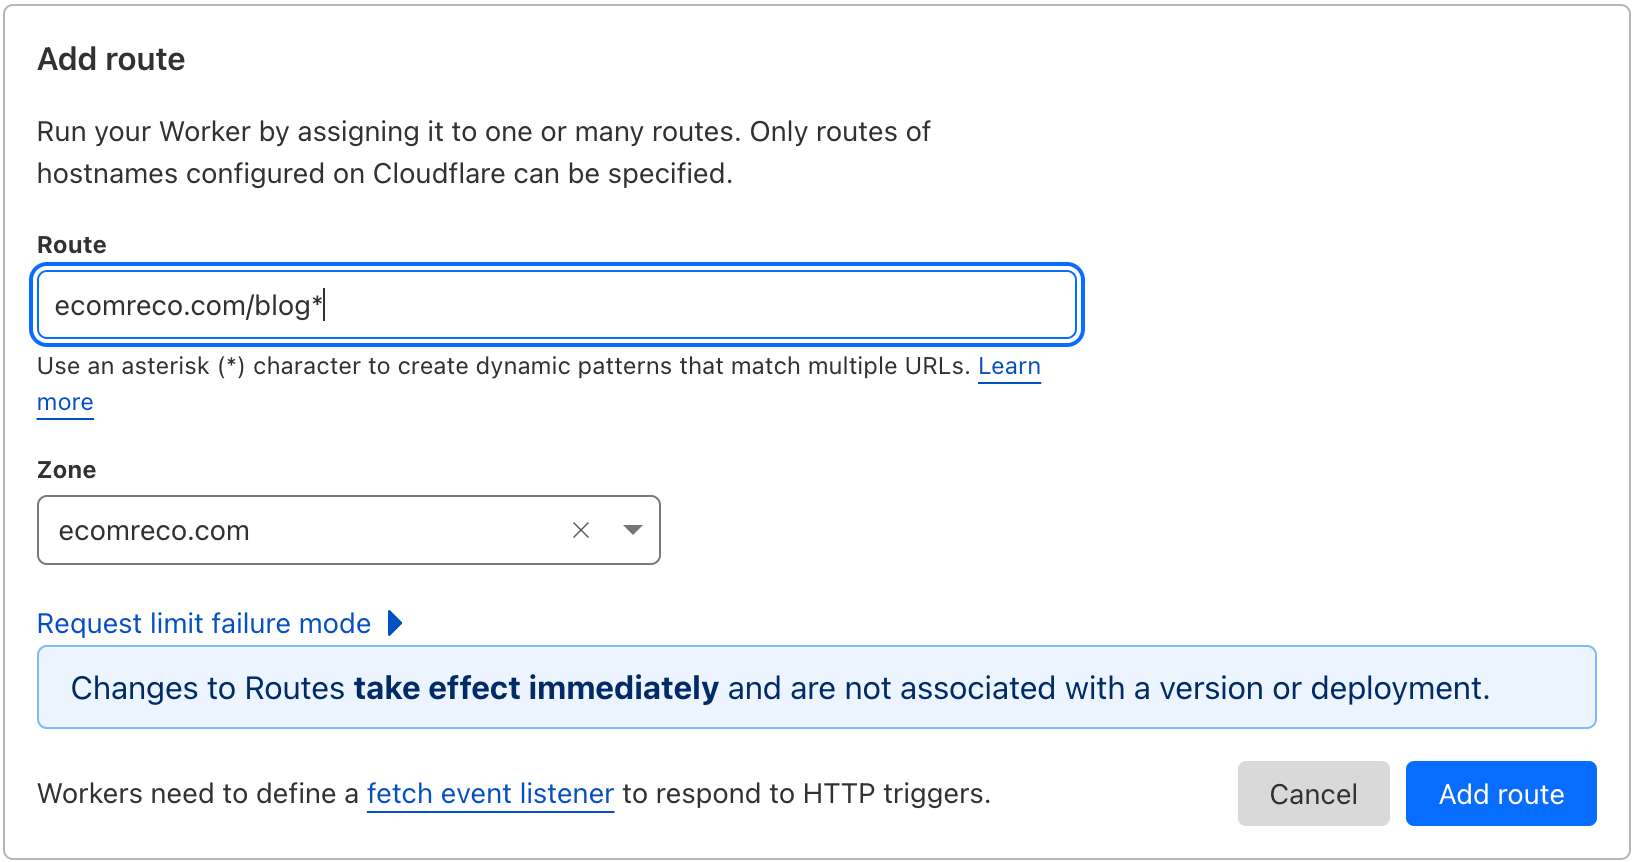
5. Setup Sub-folder in Feather Dashboard
In Feather, navigate to Settings > Features and switch on “Enable Subdirectory” feature and after that go to Settings > Sub-folder management and enter the following values,
![notion image](https://cdn.feather.blog?src=https%3A%2F%2Fusenotioncms.com%2Fproxy-prod%2Fblock%2F6543b8ca-e553-40ab-a8a0-08dc47c43542%2F1631a2ee-6541-4fd1-b6c5-e6268d8d6829%2Ff002c14d-2b4d-453a-9f4c-6ada032f9fd7%2FCleanShot_2024-06-22_at_18.05.282x.png&optimizer=image&quality=80&width=280)
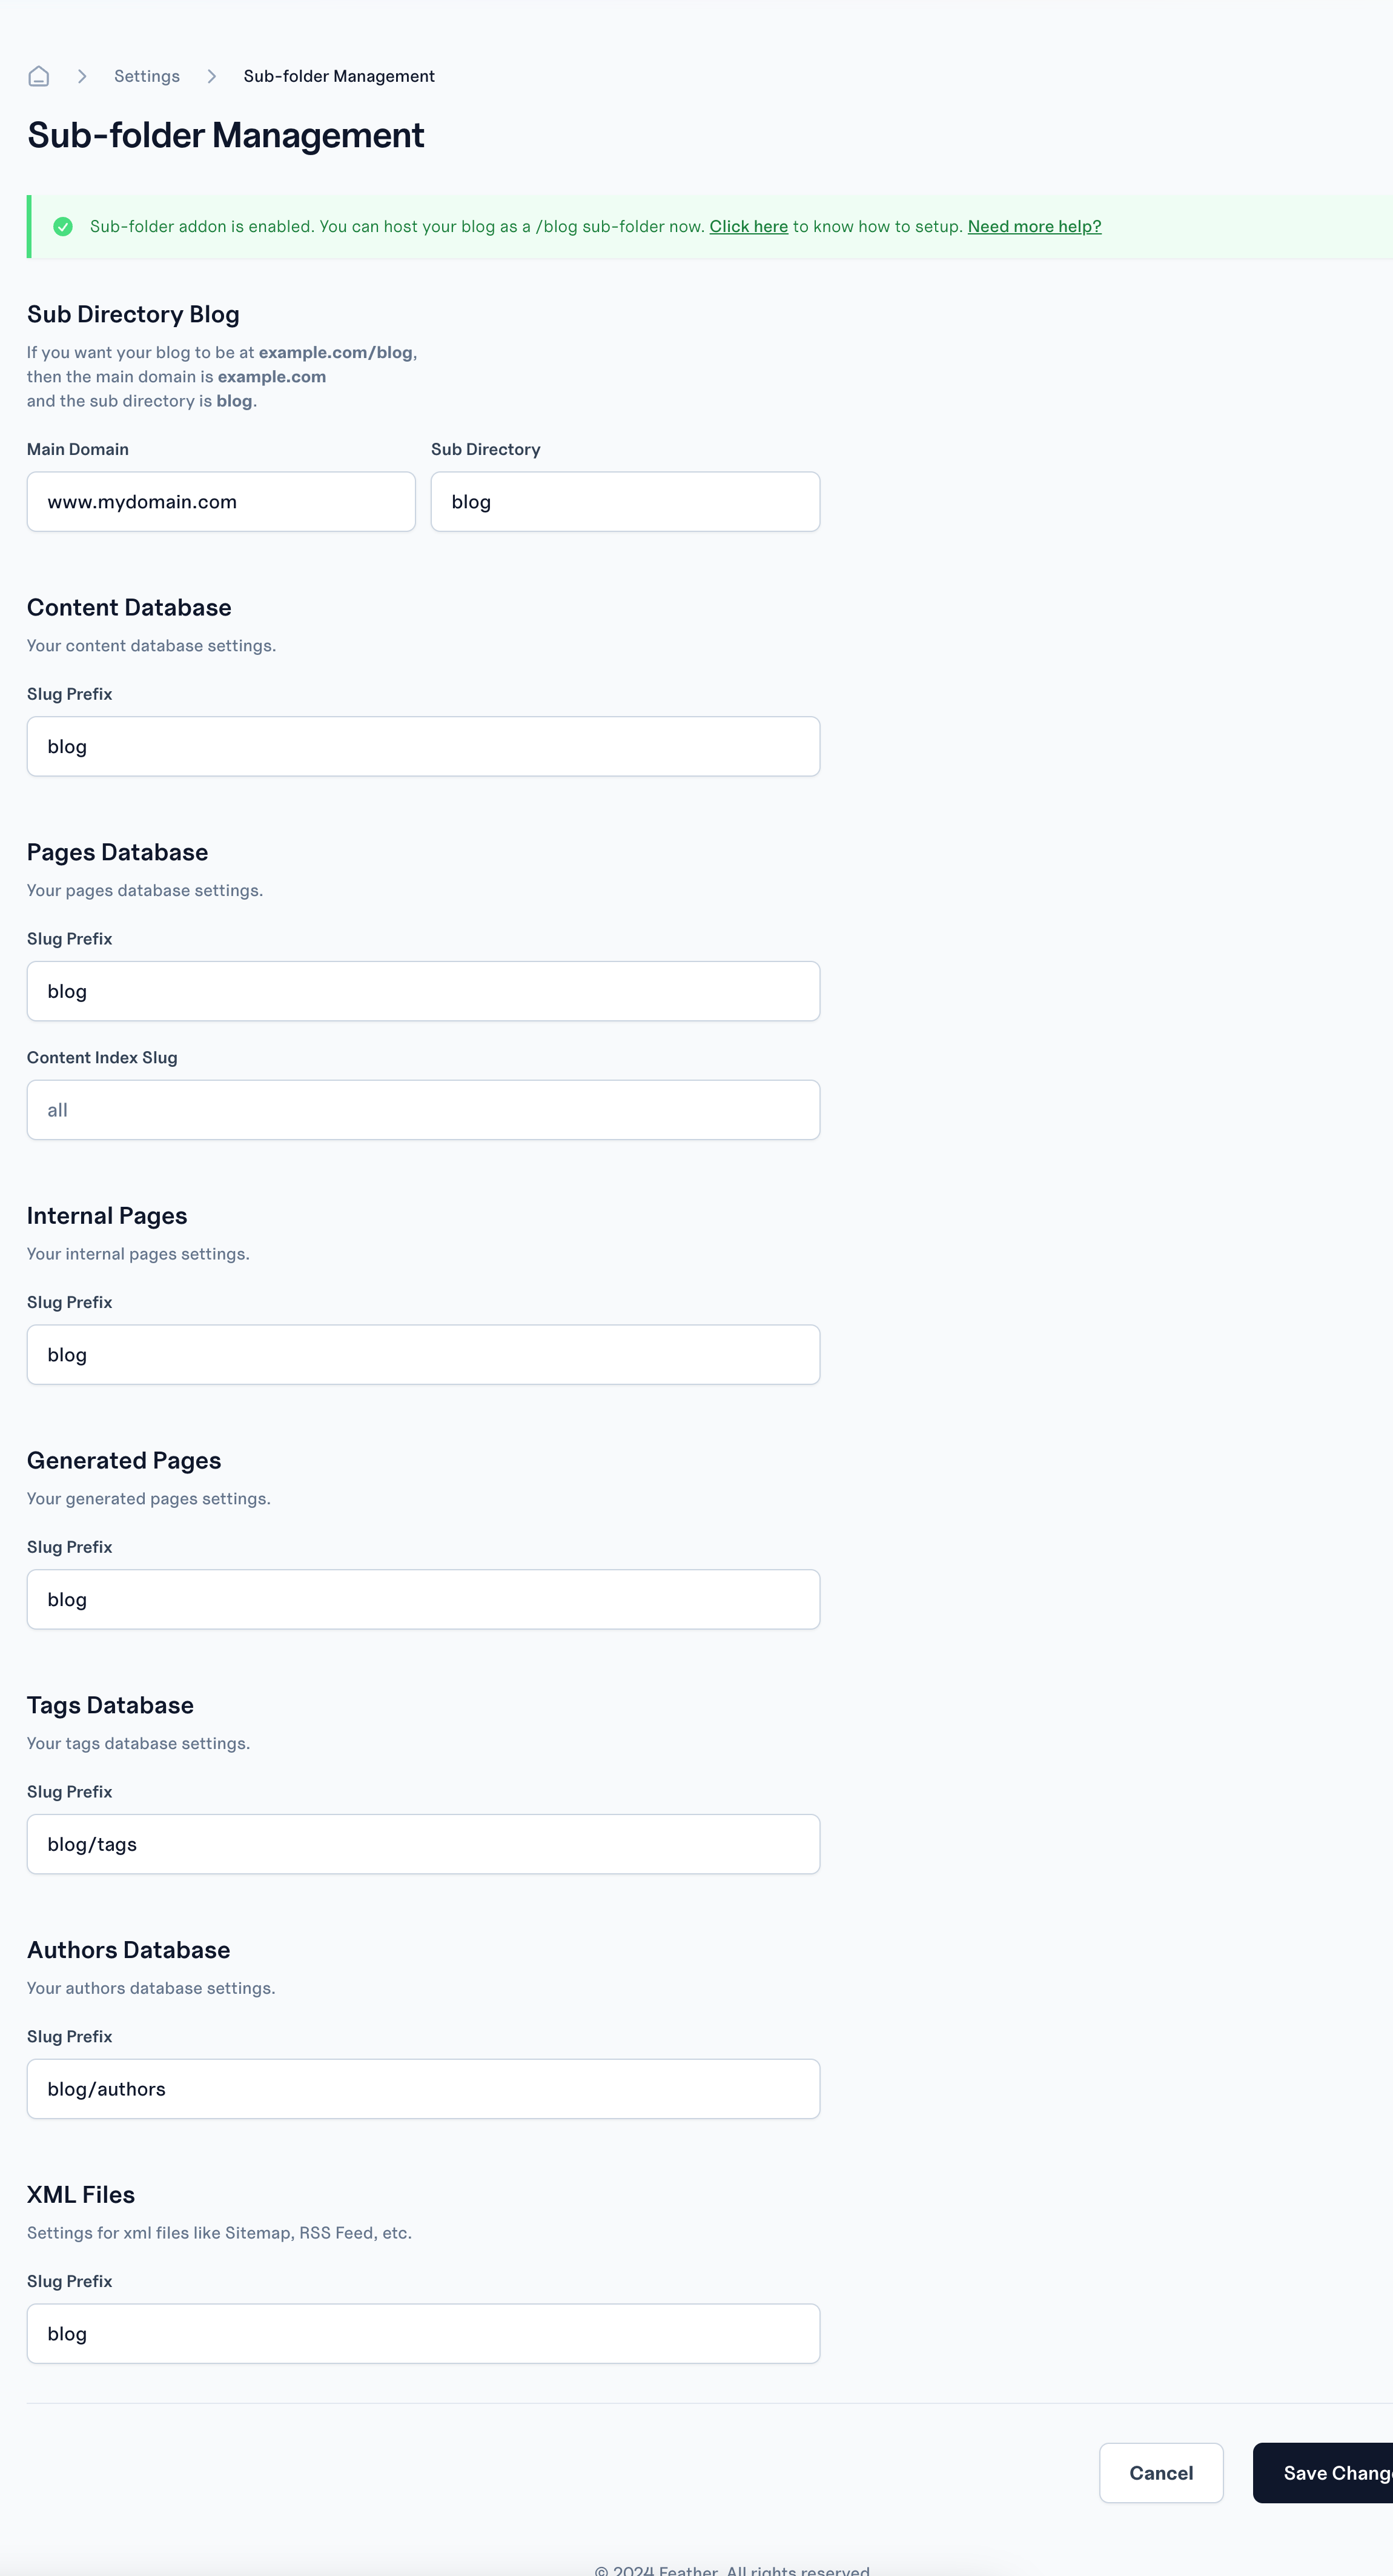
Make sure to replace
www.mydomain.com
with the domain you are using and blog
with whatever sub-route you plan to use.Important Note: Under the Domains section make sure that you are using Subdomain settings. If you have added a custom domain there, please remove it. Sub-folders does not require the Custom Domain configurations and if you have it, then the sub-folder will not work.
Once you do these, your sub-folder should be live. You should be able to access your feather site on
www.mydomain.com/blog
. If it’s not reach out to us at support@feather.so.